Upgrade or Replace BlackArmor NAS110 Drive

My BlackArmor NAS110 came with a 1TB 7200 RPM drive.  I ran out of room so I stole a 2TB drive from a new computer I ordered and wanted to use it in the BlackArmor.

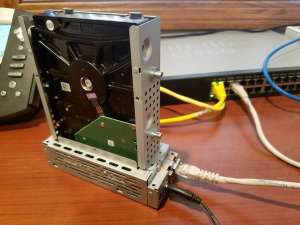
To successfully do this, I needed to wipe the partitions from the new drive.  So I hooked it up to my desktop computer using a 2.5/3.5 SATA caddy.

diskpart
list disk
select disk 2
clean

That was the command sequence.  Be careful to select the proper disk or you can wipe the partitions from any drives attached!

Little did I know it was this simple.  At first, I just threw the drive into the BlackArmor NAS110 thinking it’d nuke and pave it and load whatever was necessary.

Nope.

After a few failed attempts, I finally just decided to wipe the disk (not creating a new partition).

If you need information on tearing this case open, head over to http://crapnas.blogspot.com/2010/04/opening-box.html.

I knew I was heading in the right direction because after wiping partitions and then booting it up in the BlackArmor, it rebooted after about 30 seconds of being on with an Amber light.  After the bootup, I hear disk activity and no Amber light — no IP yet, so I think it’s formatting the drive at this point.  2TB may take a hot minute.
Script Diskpart

I had 8 thumbdrives I needed to format and set as bootable today.  The nice thing about diskpart command-line utility is that you can put all your diskpart commands in a plain text file and call that file using the /s command-line switch.
Please note: select disk 1 is specific to my environment. Please run diskpart manually and issue list disk to determine which USB drives.

diskprep.txt

This is the file which contains my diskpart commands.

select disk 1
clean
create partition primary
select partition
format fs=ntfs label=BOOT quick
active
assign

PrepDisk.bat

This is the batch file I used.

@echo off
diskpart /s diskprep.txt
pause
exit

Create a Bootable USB Flash Drive Using Diskpart

A few steps to make a bootable USB flash drive using the diskpart command. Requires an elevated command prompt.
1. Start diskpart

C:WINDOWSsystem32>diskpart

Microsoft DiskPart version 6.3.9600
Copyright (C) 1999-2013 Microsoft Corporation.
On computer: CTCRK8
DISKPART

2. Select USB flash drive

DISKPART> list disk

  Disk ###  Status         Size     Free     Dyn  Gpt
  --------  -------------  -------  -------  ---  ---
  Disk 0    Online          223 GB      0 B
  Disk 1    Online          298 GB   350 MB
  Disk 2    Online           29 GB      0 B
DISKPART> select disk 2
Disk 2 is now the selected disk.

3. Clean (remove partitions and any format of active disk)

DISKPART> clean

DiskPart succeeded in cleaning the disk.

4. Partition

DISKPART> create partition primary
DiskPart succeeded in creating the specified partition.

5. Format

DISKPART> select partition 1
Partition 1 is now the selected partition.
DISKPART> format fs=ntfs label=Bootable quick
  100 percent completed
DiskPart successfully formatted the volume.

6. Set Active bit

DISKPART> active
DiskPart marked the current partition as active.

7. Assign Drive Letter (Optional Step)

DISKPART> assign
DiskPart successfully assigned the drive letter or mount point.

Windows 7 USB DVD Download Tool

It never ceases to amaze me at how much I still don’t know and how much cool stuff is out there application-wise.
I was wanting to create a bootable UFD for the Windows 8 Developer preview and needed to remind myself the commands to use via “diskpart”. Ended up Googling it and came across a tool that Microsoft actually made for doing this which is quite nice.

Windows 7 USB/DVD Download Tool

http://www.microsoftstore.com/store/msstore/html/pbPage.Help_Win7_usbdvd_dwnTool

Direct Download

You can use this to create Windows 7 bootable USB drive and/or DVD (and use it to create Windows 8 bootable by pointing it to the Windows 8 Developer preview ISO).

I also had posted earlier on how to use diskpart to create a bootable UFD.

If you get the error The selected file is not a valid ISO file. Please Select a valid ISO file and try again when trying to use a custom ISO, check out Rafael’s blog from 2009 – he made a tool to fix this and explains what the problem is.